The Dawson Series |
|
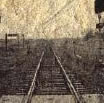
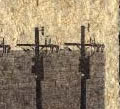
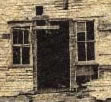
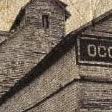
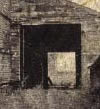
The Dawson series was photographed in or near Dawson, North Dakota on a wet but windless day in the spring of 1999. The cloud layer was thin so light penetrated it easily but was very evenly dispersed leaving little, if any, directional shadow. The rain left the surface of my subjects dark or reflective which added considerably to the contrast without ruining the more subtle light qualities. Basically, it was a beautiful day for this series of photographs. The subject is the little town of Dawson, at the time it had the ruins of an abandoned grain elevator on the outskirts of town and several empty buildings. Since then the elevator has fallen victim to arson and the little gas station has been converted to a massage parlor. At the time, however, they stood as symbols of a bygone past that offered the hope of prosperity unfulfilled. The images, recorded on black and white film, are printed on paper made from the prairie grass of North Dakota. The paper itself then not only is, but represents, the plains of the midwestern United States. In a certain sense the experience has been reconstructed, to some degree, in a very real way. |
|
       |
|
< Return to the artwork at jrieger.com
|
|